Build Smallest Android App (6KB) From Scratch
■ src/com/myapp/MainActivity.java
■ AndroidManifest.xml
■ Import to Android Studio
■ Build Project
Build Smallest Android App? Why? You may ask. Many developers write Android app development tutorials. The first tutorial will be of course the world famous “Hello World”. When I built my first Android app following such a tutorial I was confused a little bit about the output.
In every other programming language and platform I have tried (I have tried many, but I’m not an expert) the output of the Hello World was typically very small. Most of them were even less than 100 KB. But Android was totally different. The output APK was more than 1 MB and after installation there was an explosion.
From my experiences a good software product will be comparatively small in size. It will have low memory consumption, error free performance and very straight forward and consistent UI and UX. It won’t require a documentation. So why such a simple app violates the first two things?
I reverse engineered the APK file and made a deeper look into it. I figured it out that the additional things in the APK were for the compatibility of material design and other functionalities across all the Android versions. Google calls this library as AppCompat.
So can I build an app without AppCompat so that the size of APK will be the least possible? Yes. But the app will look ugly and inconsistent across different versions of Android. You can make it better with some hard work though. But it will be difficult for a beginner. On the other hand it will be the best idea for starting to learn Android app development from zero. So I would like to share this with you.
So first create files and directories in the following structure:
myapp
    |--res
    |    |--layout
    |           |--activity_main.xml
    |--src
    |   |--com
    |       |--myapp
    |              |--MainActivity.java
    |
    |--AndroidManifest.xml
Now add add contents to the files as follows.
<?xml version="1.0" encoding="utf-8"?>
<LinearLayout xmlns:android="http://schemas.android.com/apk/res/android"
    android:orientation="vertical" android:layout_width="match_parent"
    android:layout_height="match_parent">

    <TextView
        android:layout_width="match_parent"
        android:layout_height="wrap_content"
        android:text="Hello World"/>

</LinearLayout>
This is the XML file that describes the user interface of app. You can see that there is a LinearLayout which shows elements in the interface one after another. And its orientation is vertical. That means its sub elements will be arranged one below the other. Its width and height is set to match_parent which is self explanatory. It will have the width and height of the screen.
There is a TextView component inside LinearLayout. It is used to show strings in the interface. Here it prints the text parameter value which is Hello World. Its width is set to match_parent so it will stretch to the width of LinearLayout. Its height is set to wrap_content. This sets the height according to the size of its content which is the string.
src/com/myapp/MainActivity.java
package com.myapp;

import android.app.Activity;
import android.os.Bundle;

public class MainActivity extends Activity {

    @Override
    public void onCreate(Bundle savedInstanceState) {
        super.onCreate(savedInstanceState);
        setContentView(R.layout.activity_main);

    }

}
This is the java code of our app. This is for only one activity – MainActivity. Activity is a window, like in Windows. For eg: login, register, splash screen, main content, settings etc. are different activities in Facebook app. At a time only one activity will be live. When an activity is launched onCreate method is called. Inside it you can see a function setContentView. It takes R.layout.activity_main as input. That is our user interface. That means this command will load the user interface defined in activity_main.xml and show it to user.
AndroidManifest.xml
<manifest xmlns:android="http://schemas.android.com/apk/res/android"
    package="com.myapp">
    <application
        android:label="AppNameInSettings"
        android:theme="@android:style/Theme.Light.NoTitleBar">

        <activity
            android:name=".MainActivity"
            android:label="AppNameInLauncher" >

            <intent-filter>
                <action android:name="android.intent.action.MAIN" />
                <category android:name="android.intent.category.LAUNCHER"/>
            </intent-filter>

        </activity>
    </application>
</manifest>
Manifest file contains the meta information about the app. The parameter package tells the package name of the app. Here it is com.myapp. The application tag specifies the properties of the app. It can be the permissions required to run it, different activities and services present in it etc.
Application tag has property label. It is the name of the app shown in the settings section and install screens. The theme property sets the overall app theme. Here it is set as Theme.Light. You can change this to Material design. But it will work only in Lollipop and later versions. Because we did not include the AppCompat library which was suppose to give material design in previous versions.
Inside application tag we add the activities. Here we have only one activity which is MainActivity. Activity also has a label property. This sets the name shown in the launcher and in the app user interface. Usually developers set the label of application tag and main activity as the same. This is to to avoid confusion.
There is another section called intent-filter. It specify the type of action the activity supports and category of activity. Here we define action as android.intent.action.MAIN. This means activity can be launched directly. category is set as android.intent.category.LAUNCHER. This makes the activity to show up in the launcher. So if you have more than one activity in your app and you want to show it in the launcher then you can set its intent-filter in the same way.
Import to Android Studio
What we just created was an Eclipse IDE style project. When in it comes to Android Studio we need a lot of files to create a simple project. Luckily Android Studio has a feature to import Eclipse style projects. It will create Android Studio style projects out of it. So let’s do that now.
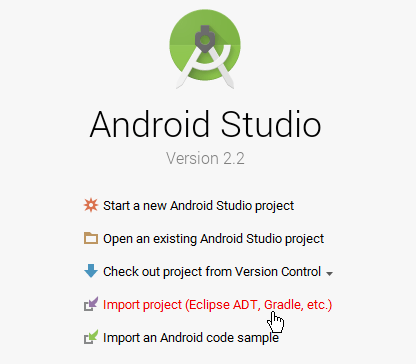
For this first open Android Studio. It will show a start screen like this. Click the import option in it.
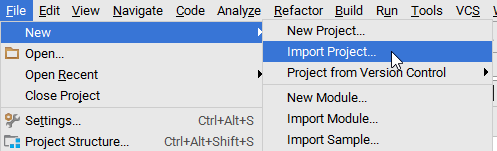
If you have already opened any other project then you must go to menu and choose the import option.
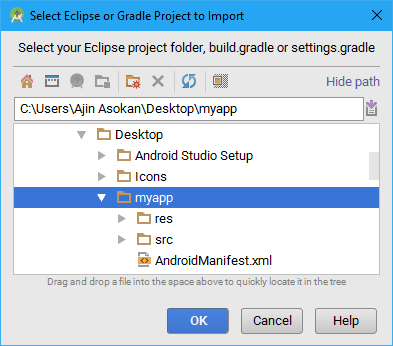
Now select the myapp folder where we stored the above files.
Choose a new folder to keep Android Studio project. Here I chose the name helloworld.
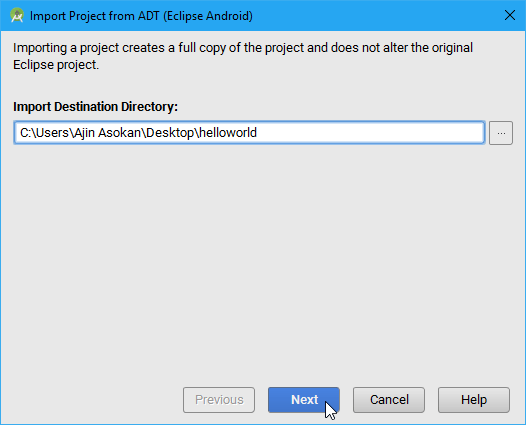
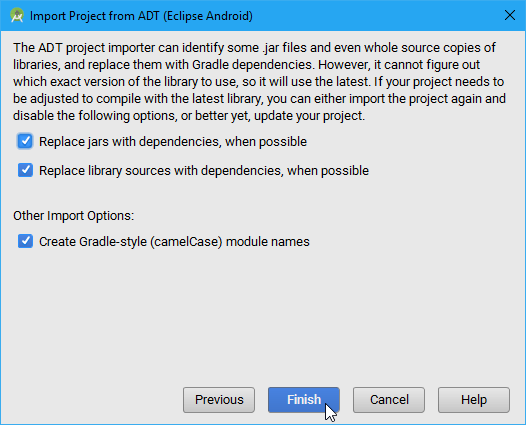
In next step click Finish to start the conversion.
It will take a minute or so to complete the import process.

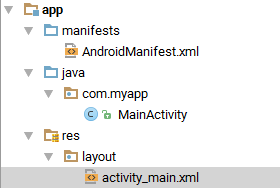
Now you have the project in Android Studio. It will have a different structure like this:
And the changes that Android Studio did on our code will be shown in a summary file. The area of interest is this part:

Build Project
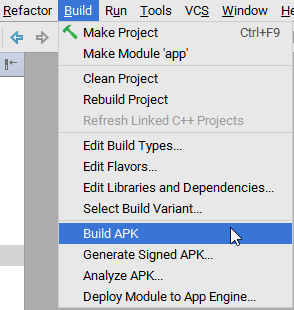
So we have our project ready. Now lets build it. Goto Build menu and click Build APK.
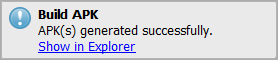
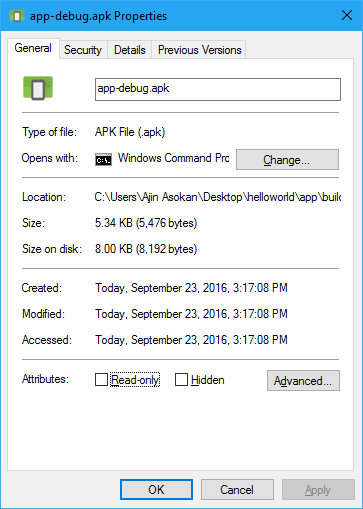
It will take some time to build it. After that it will show a popup message like this. Click on the Show in Explorer. This will open the folder that contains APK file.
Here it is. Now check the file size. 6KB!! Thats what I am talking about. This is what I call a Hello World app!
What are you waiting for? Transfer it to your phone and install it. When you open it you will see something like this:
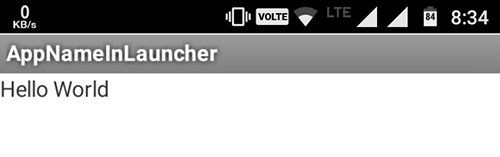
This looks like crap, I know that. But with a little hard work, better user interface can be built on top of this. Finally the result will be a damn small app. Thats what I’m going to do in my next version of Artham Malayalam dictionary.
Find this code in Github: Smallest Android App From Scratch
Download it as zip: master.zip
So I hope you understood the basics of building an app. Please share this tutorial if you like it.
To be continued..